Sculpture
Furniture
Murals, Floors, and Prints
Labyrinths
Available
About
CV
Testimonials
Artist Statement
Contact
Furniture
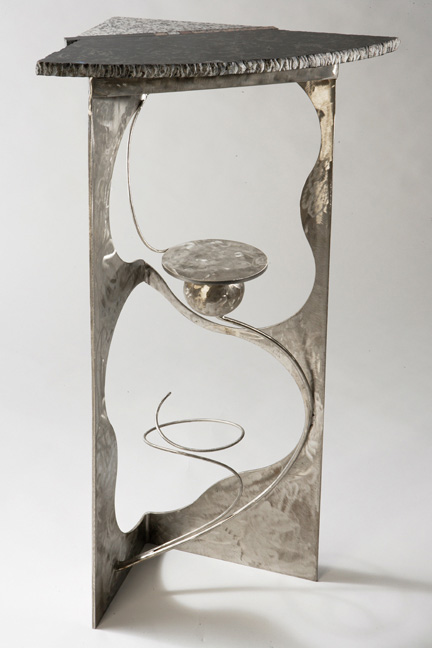
Table #3 Photo by Geoff Carr
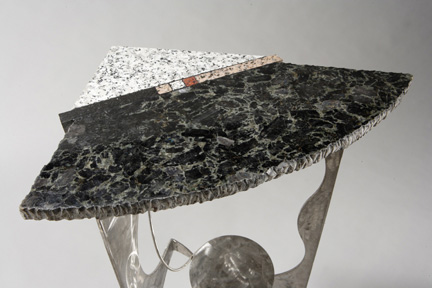
Table #3, detail
Table #3
Furniture Categories
Urban Rustic Tables ©
Material
granite, steel and stainless
Size
38″ H x 21″W x 13″D
Sculpture
Furniture
Murals, Floors, and Prints
Labyrinths
Available
About
CV
Testimonials
Artist Statement
Contact